← Back to home

Guide · 8 steps · iPhone & Android

From first trip to accounting export

Create a trip, scan receipts with on-device OCR, build an expense note, track budget & ROI, then export. Everything stays offline on your phone.

1 Trip 2 Scan 3 Note 4 Export

Full user manual (every screen) →

PikScan Expenses trips list
Phase 1 · Trip 01

Create and activate a trip

A trip (mission) groups dates, place, currency, planned budget and every receipt you scan.

  1. Install the app and finish the short onboarding (3 slides).
  2. Open the Trips tab → tap +.
  3. Fill name, start/end dates, city, venue, currency and planned budget. Optional ambiance color tints the UI.
  4. Save, then activate the trip (swipe left → Activate, or open it and set active). Scan needs an active trip.
  5. Filter the list by year, Active / Upcoming / Ongoing / Past, or search by name.
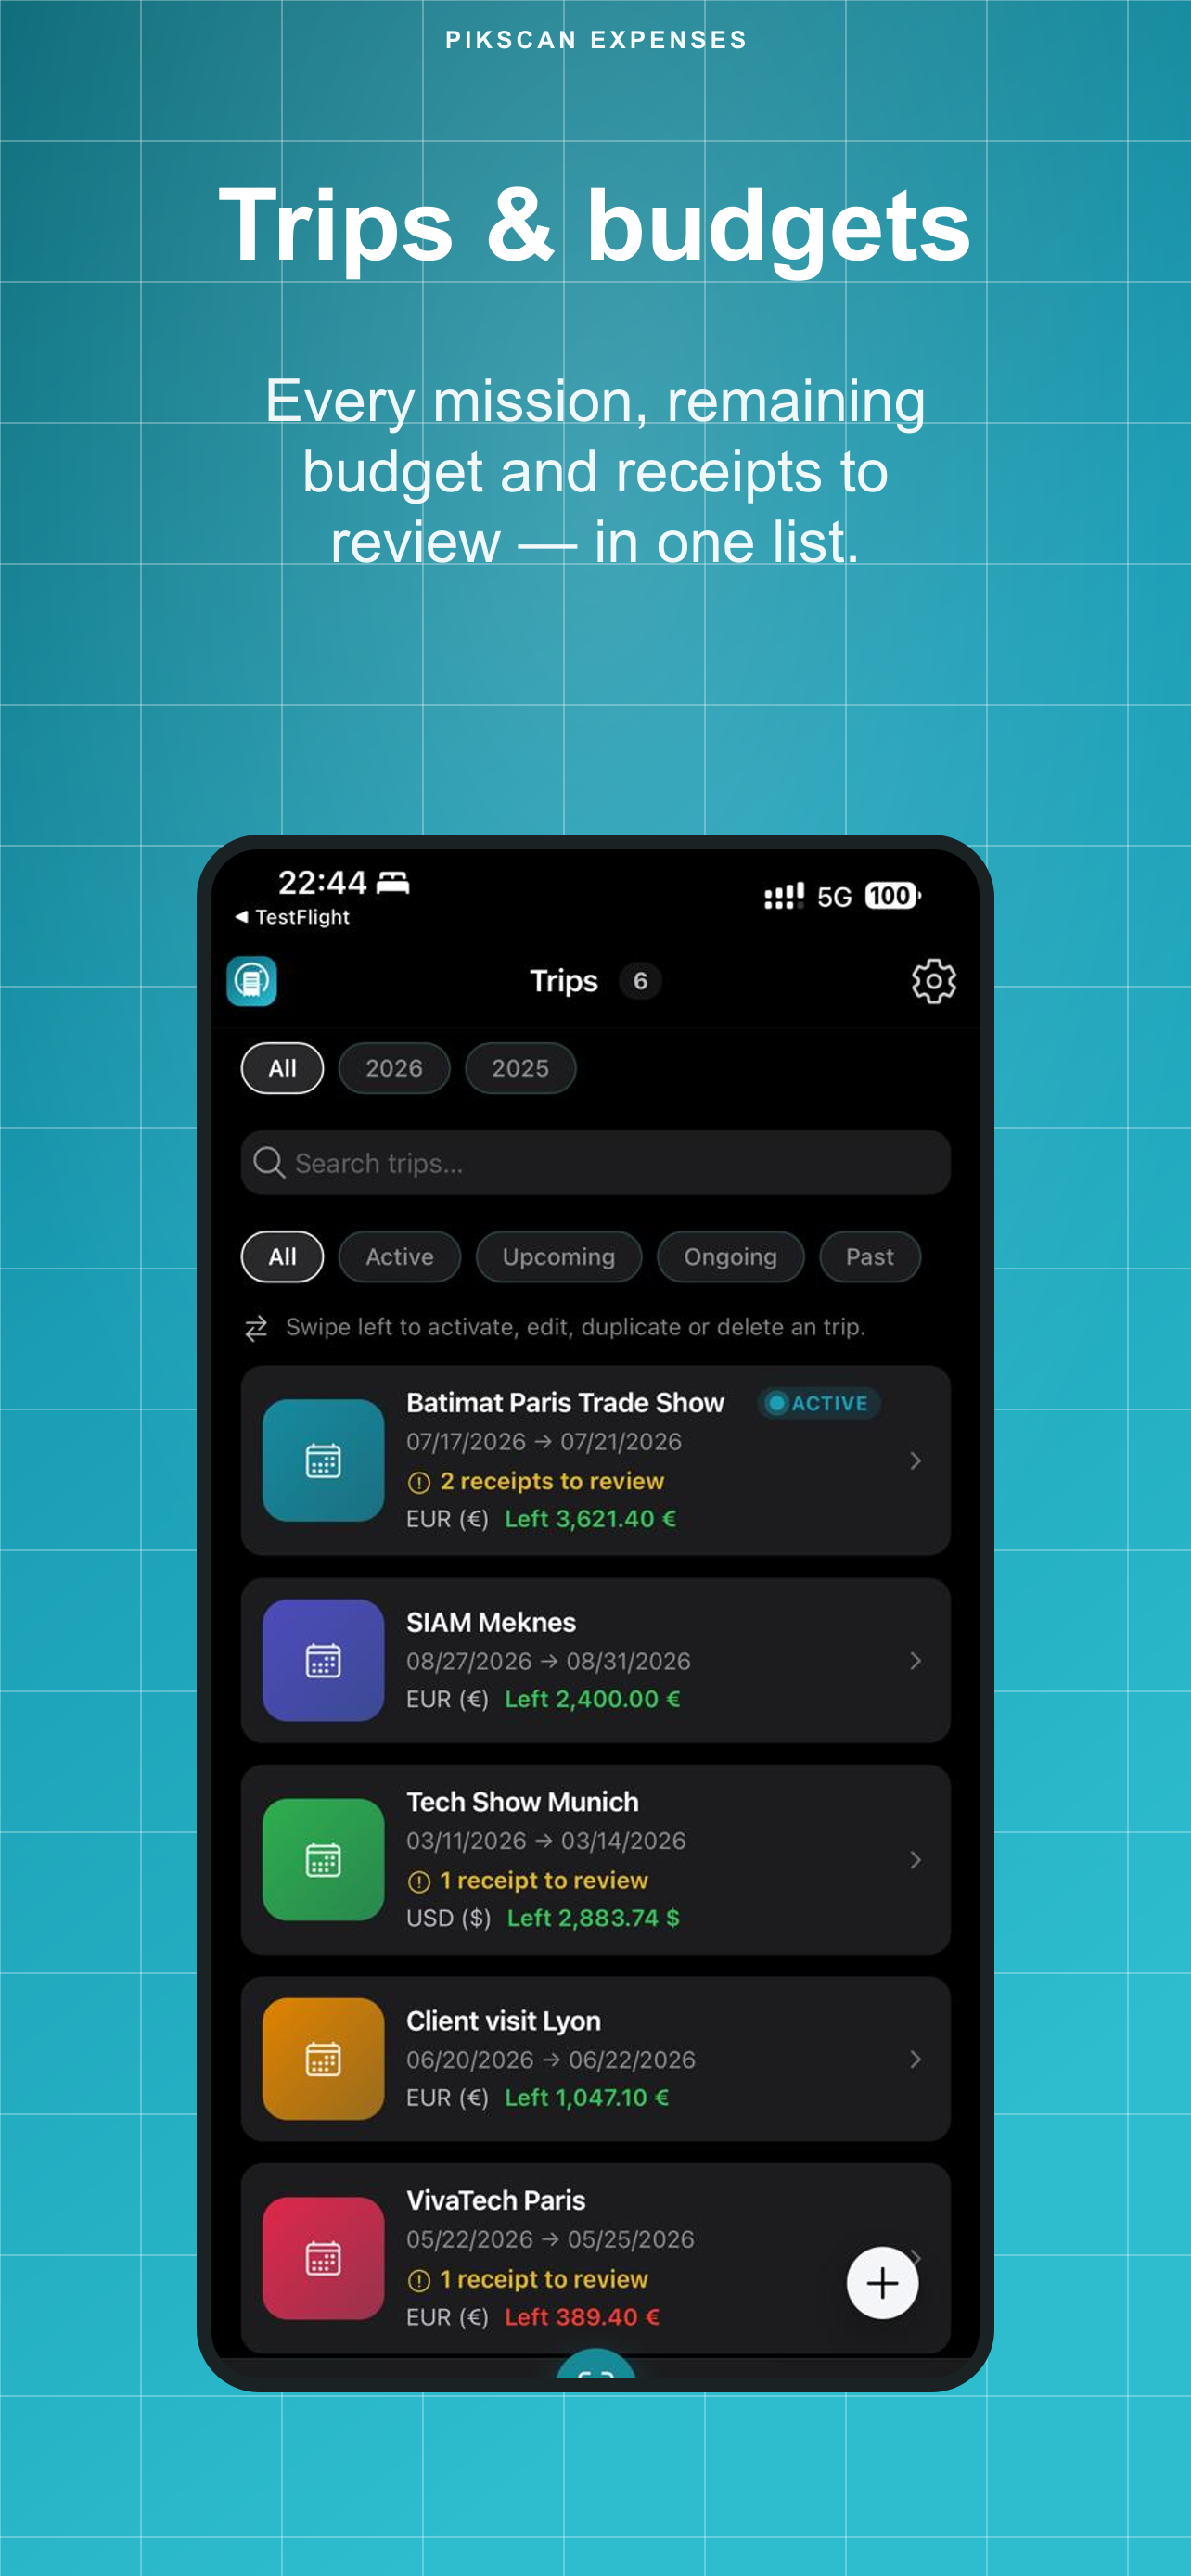
Trips list with budgets
Phase 2 · Capture 02

Scan receipts (OCR)

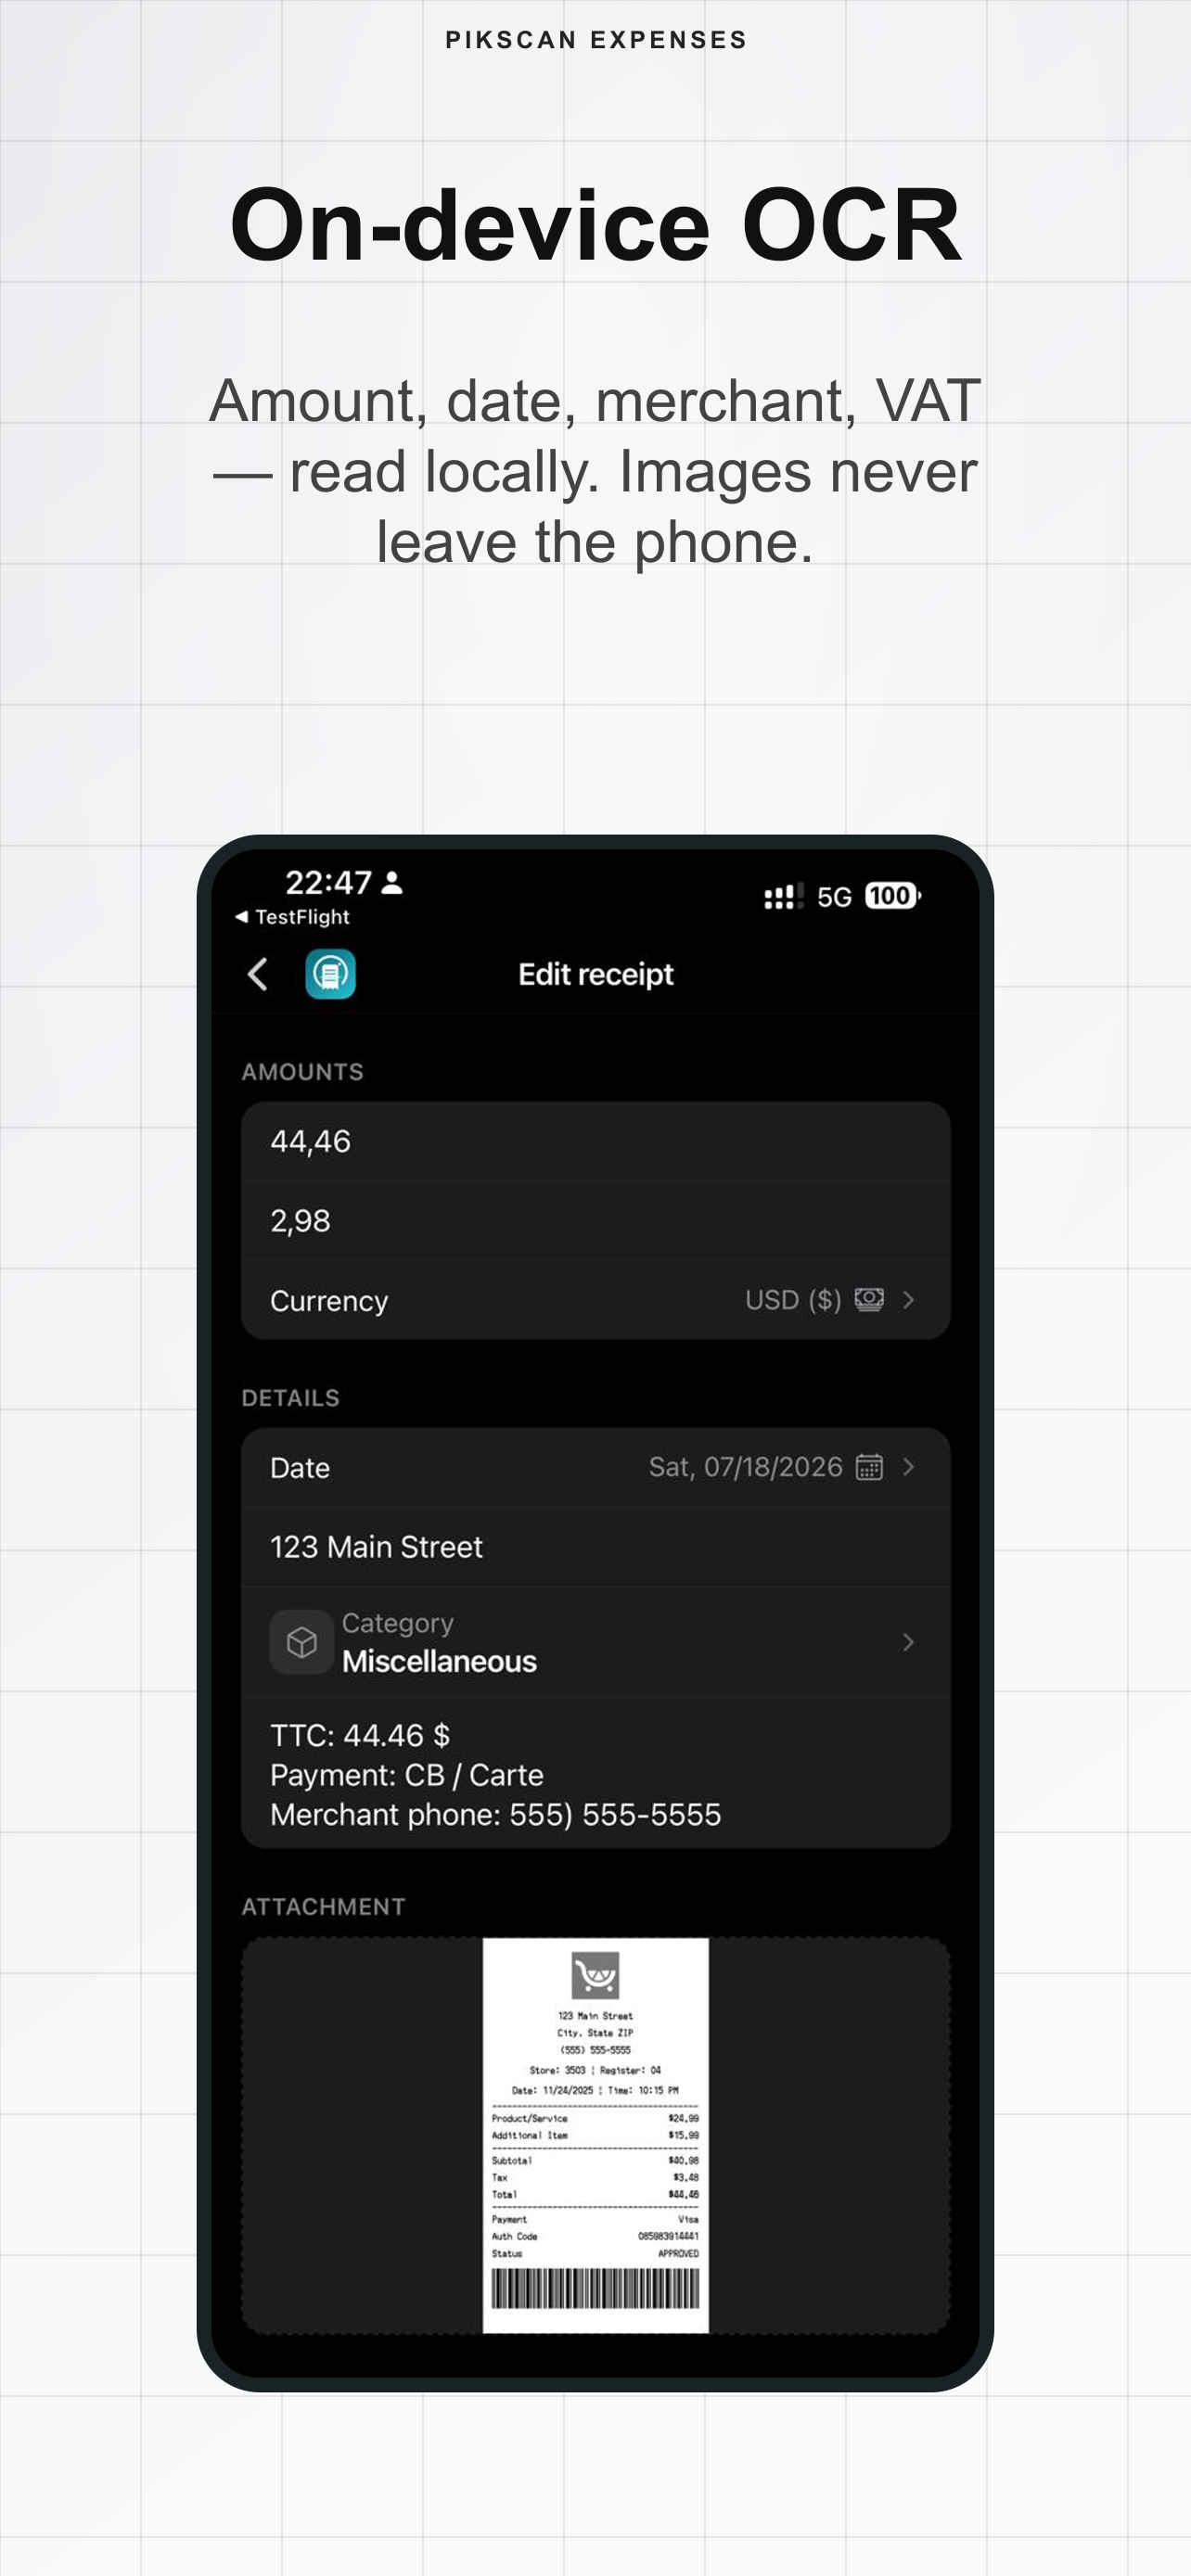
On-device OCR: amount, date, merchant, VAT and category — images never leave the phone.

  1. Open the center Scan tab. Confirm an active trip (or create one).
  2. Tap +Scan a receipt (one photo) or Scan multiple receipts (up to 10).
  3. Review OCR fields, fix if needed, then save. High confidence can auto-validate.
  4. Prefer typing? Use Manual entry — still counts as one scan.
  5. Free plan: 30 scans. Each saved receipt uses one. Premium: unlimited.
Receipt OCR edit screen
Phase 2 · Capture 03

Manage receipts on the trip

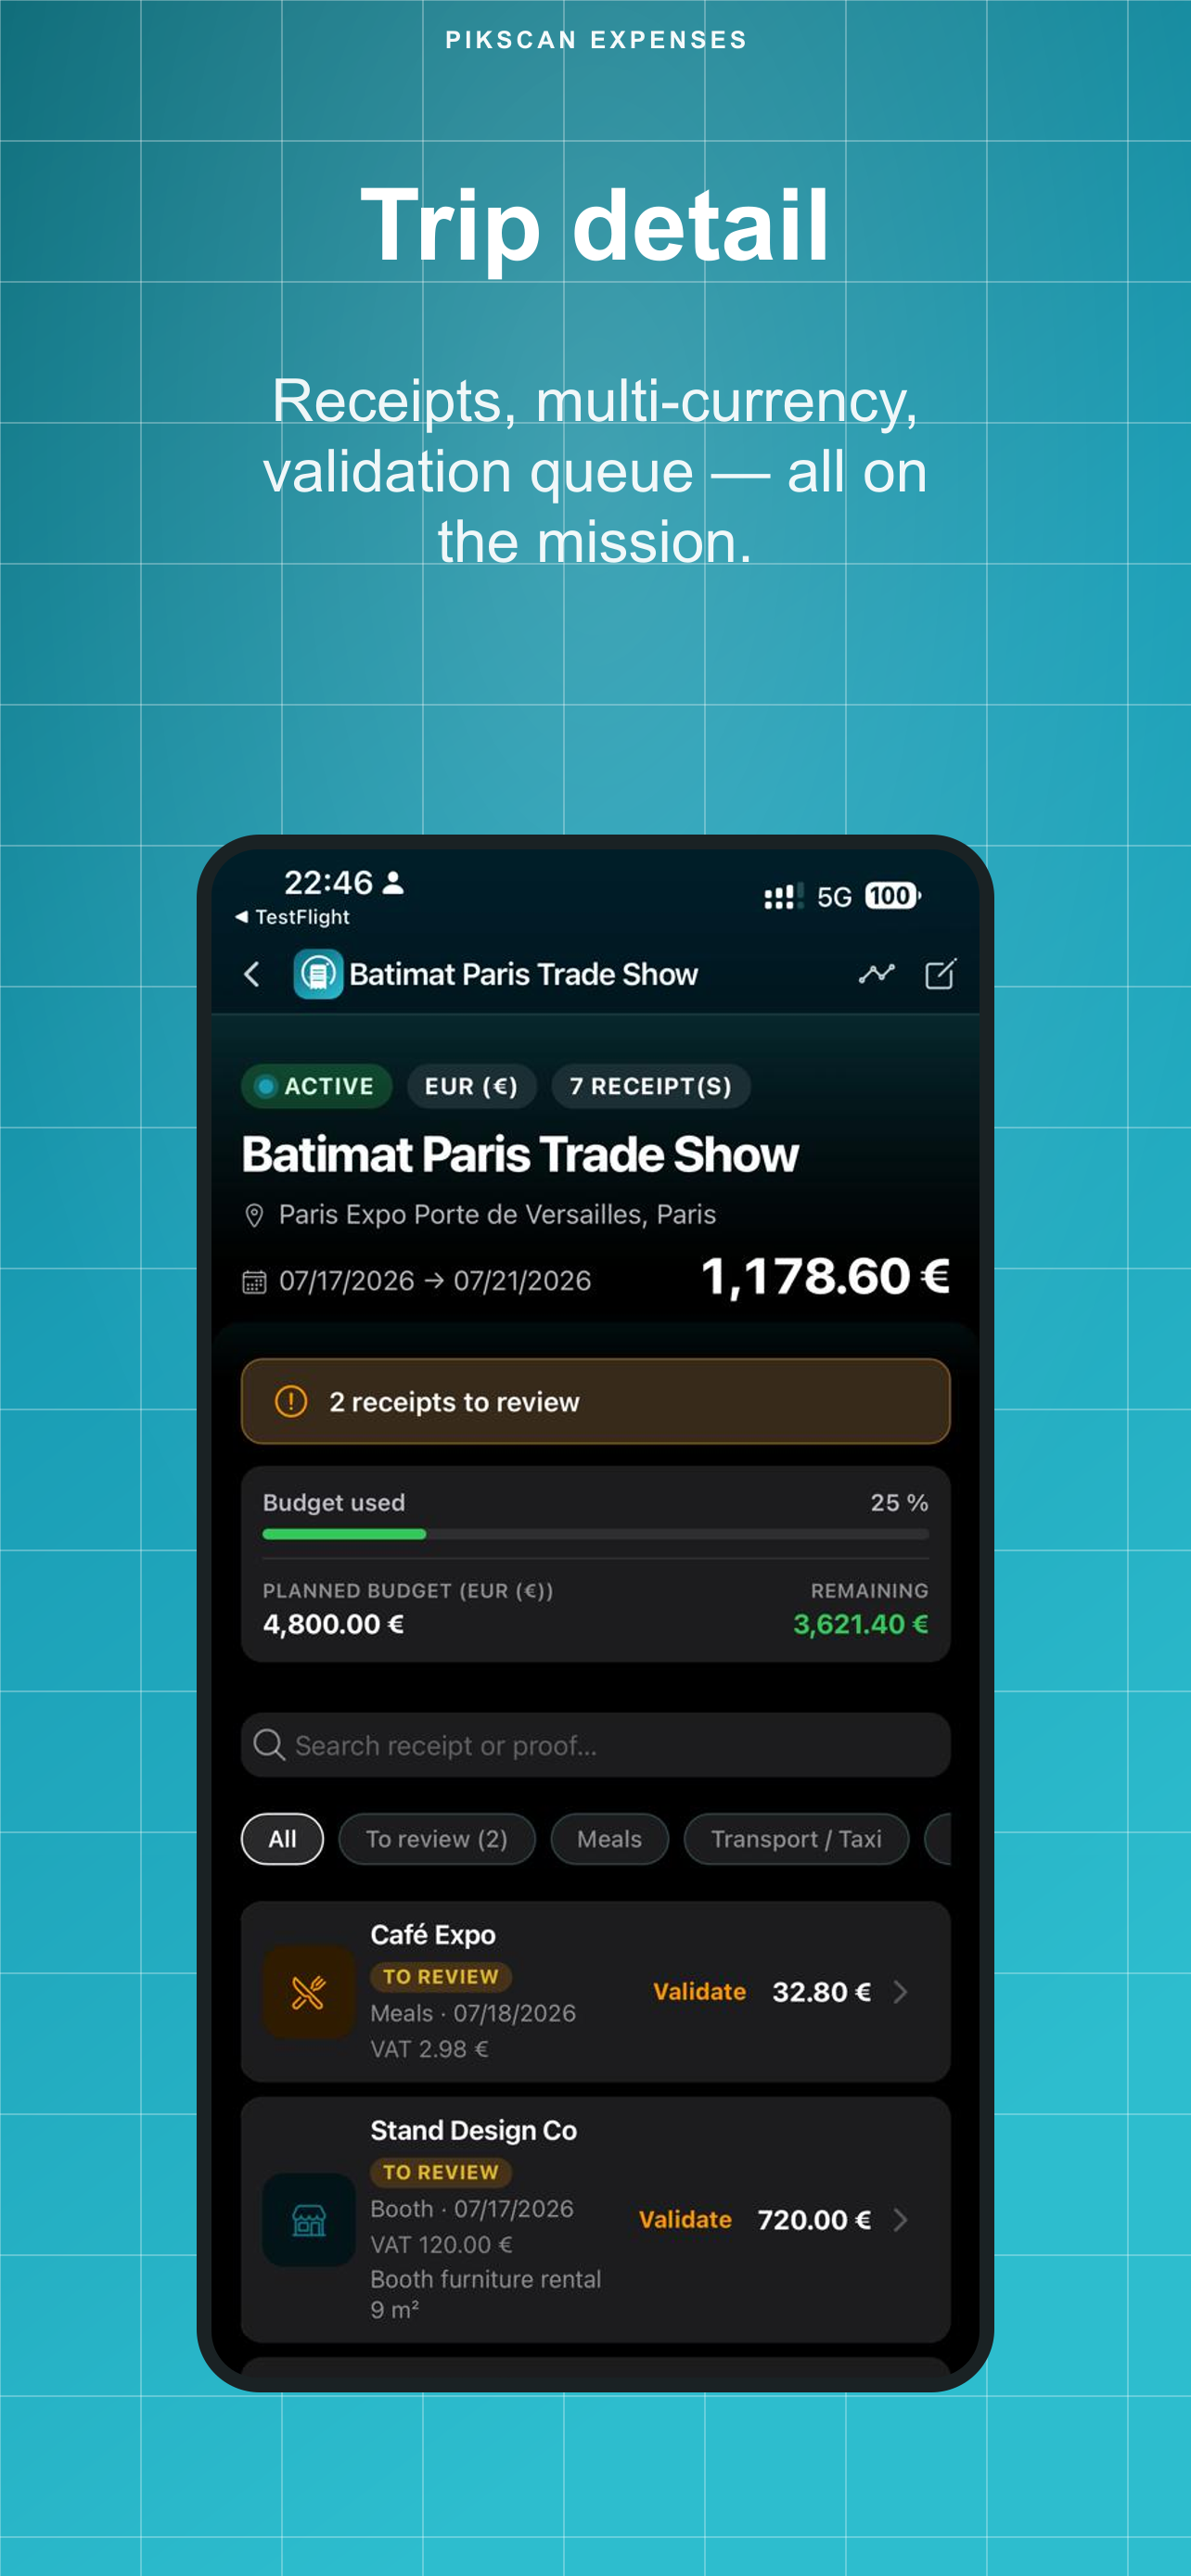
Open a trip to see budget used, multi-currency totals and the receipt list.

  1. From Trips, tap a mission card.
  2. Review budget %, remaining amount, and receipts to validate.
  3. Filter by category or “to review”. Tap a receipt to edit amount, merchant, date, VAT or category.
  4. Add another expense with + or jump to the Report from this screen.
Trip detail with receipts
Phase 3 · Expense note 04

Generate an expense note

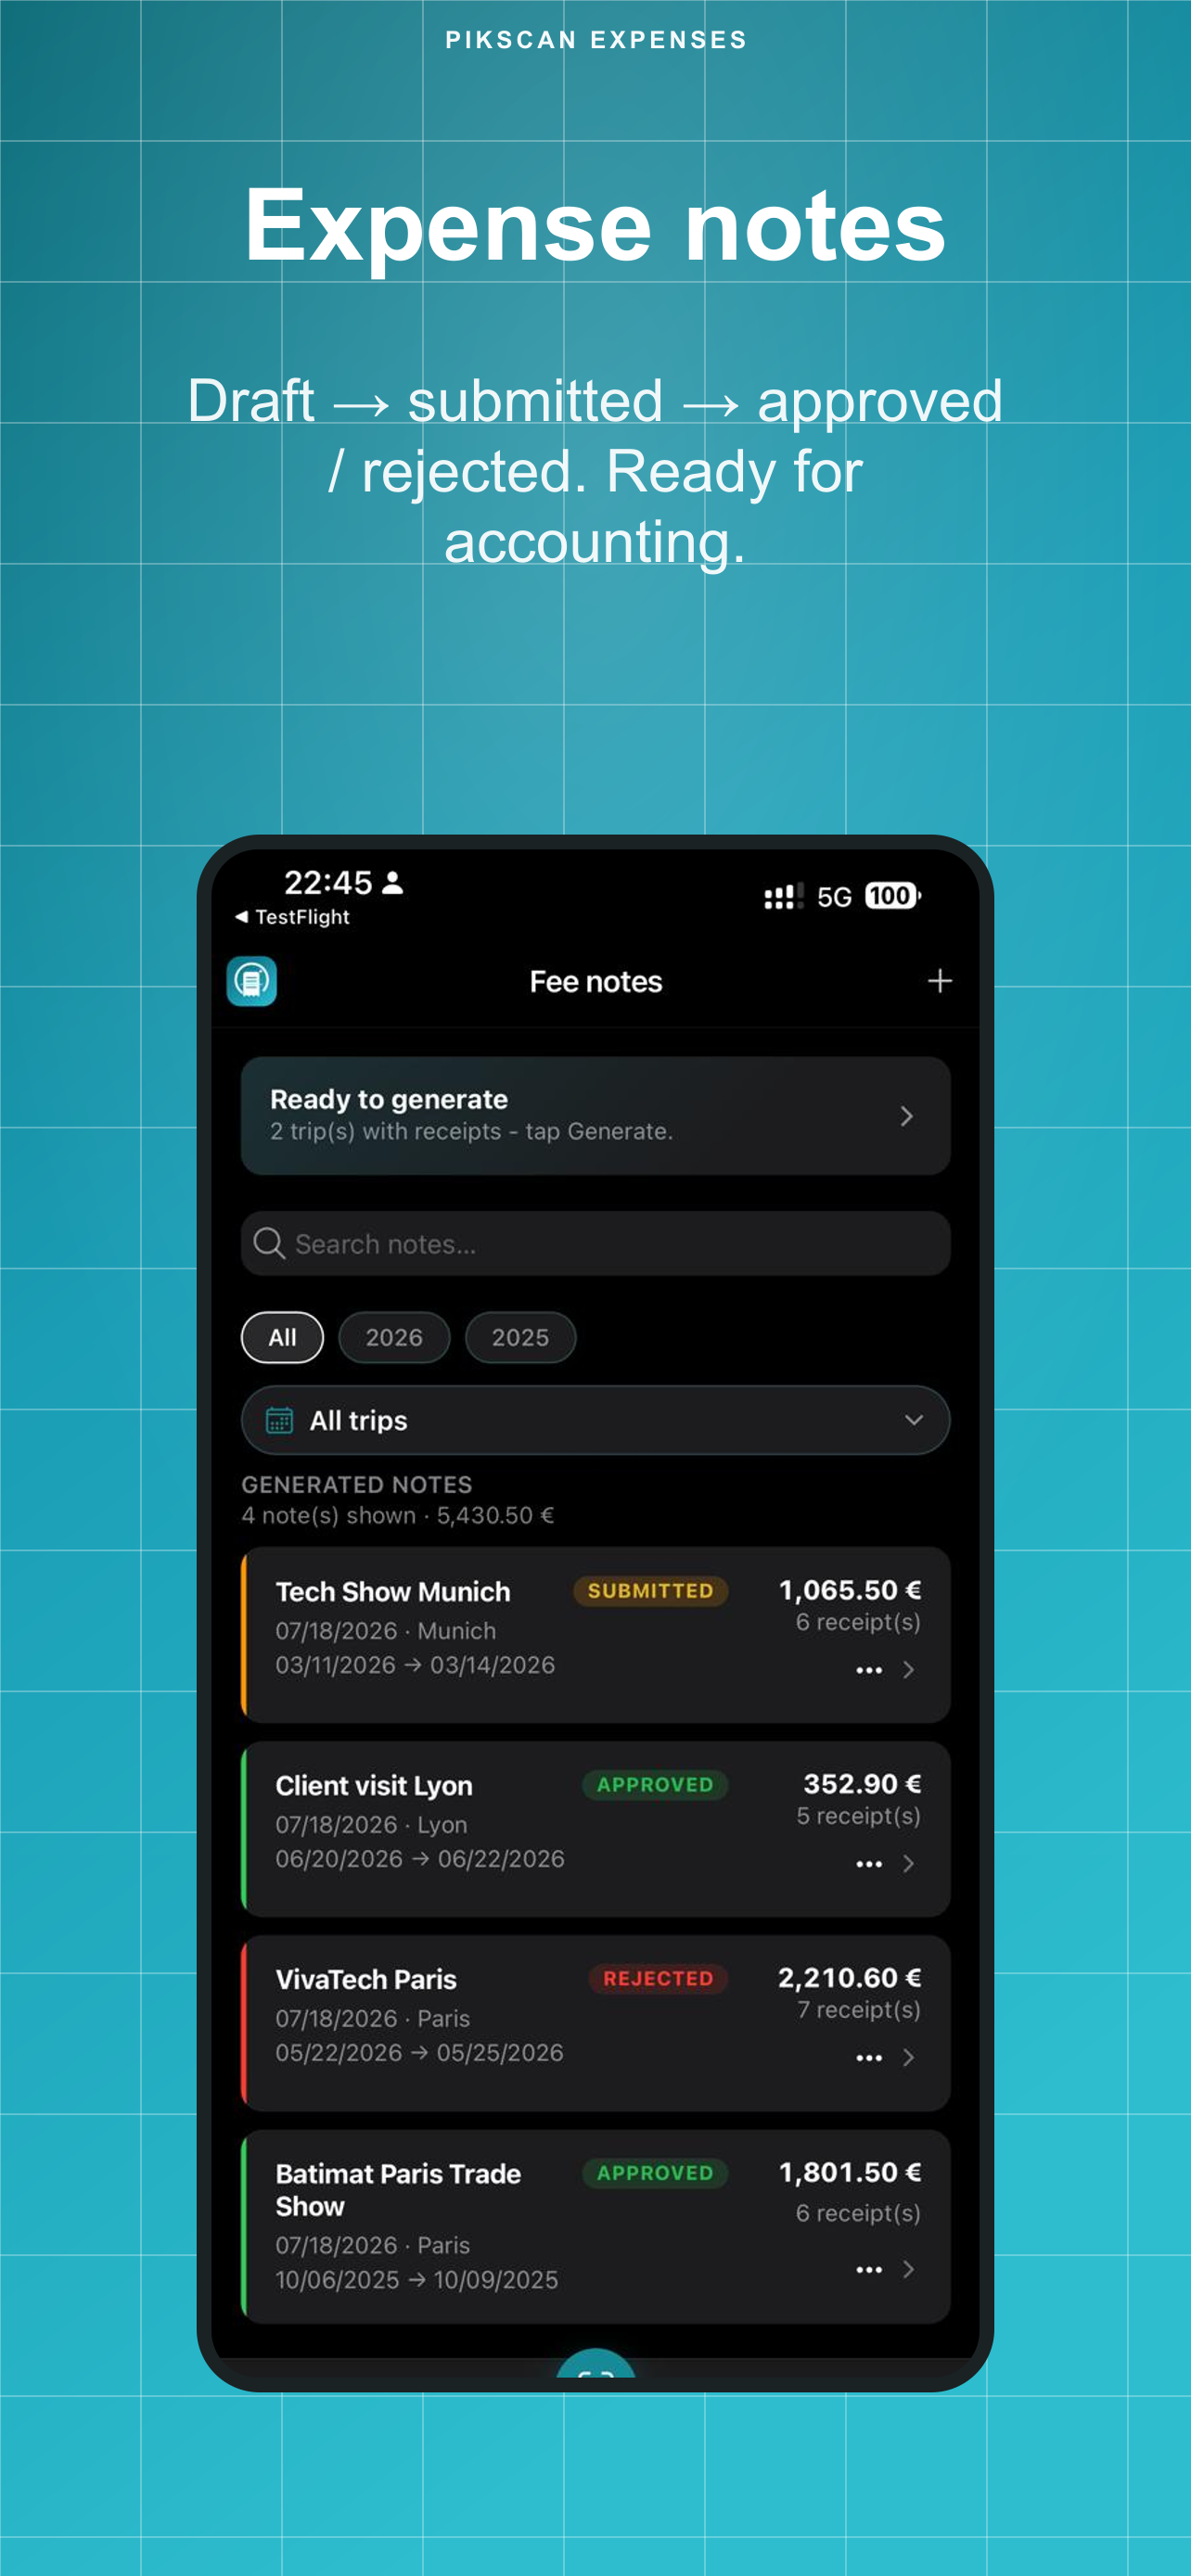
Turn a trip with receipts into a formal note: draft → submitted → approved / rejected.

  1. Open the Notes tab. Trips ready to generate appear at the top.
  2. Tap Generate a note, pick the trip, confirm.
  3. Status becomes Submitted. Managers can Approve or Reject (with optional comment) if the profile is marked manager.
  4. From the note menu (⋯): change status, export PDF (Premium), or reopen the trip.
Expense notes list
Phase 3 · ROI 05

Trip report & ROI

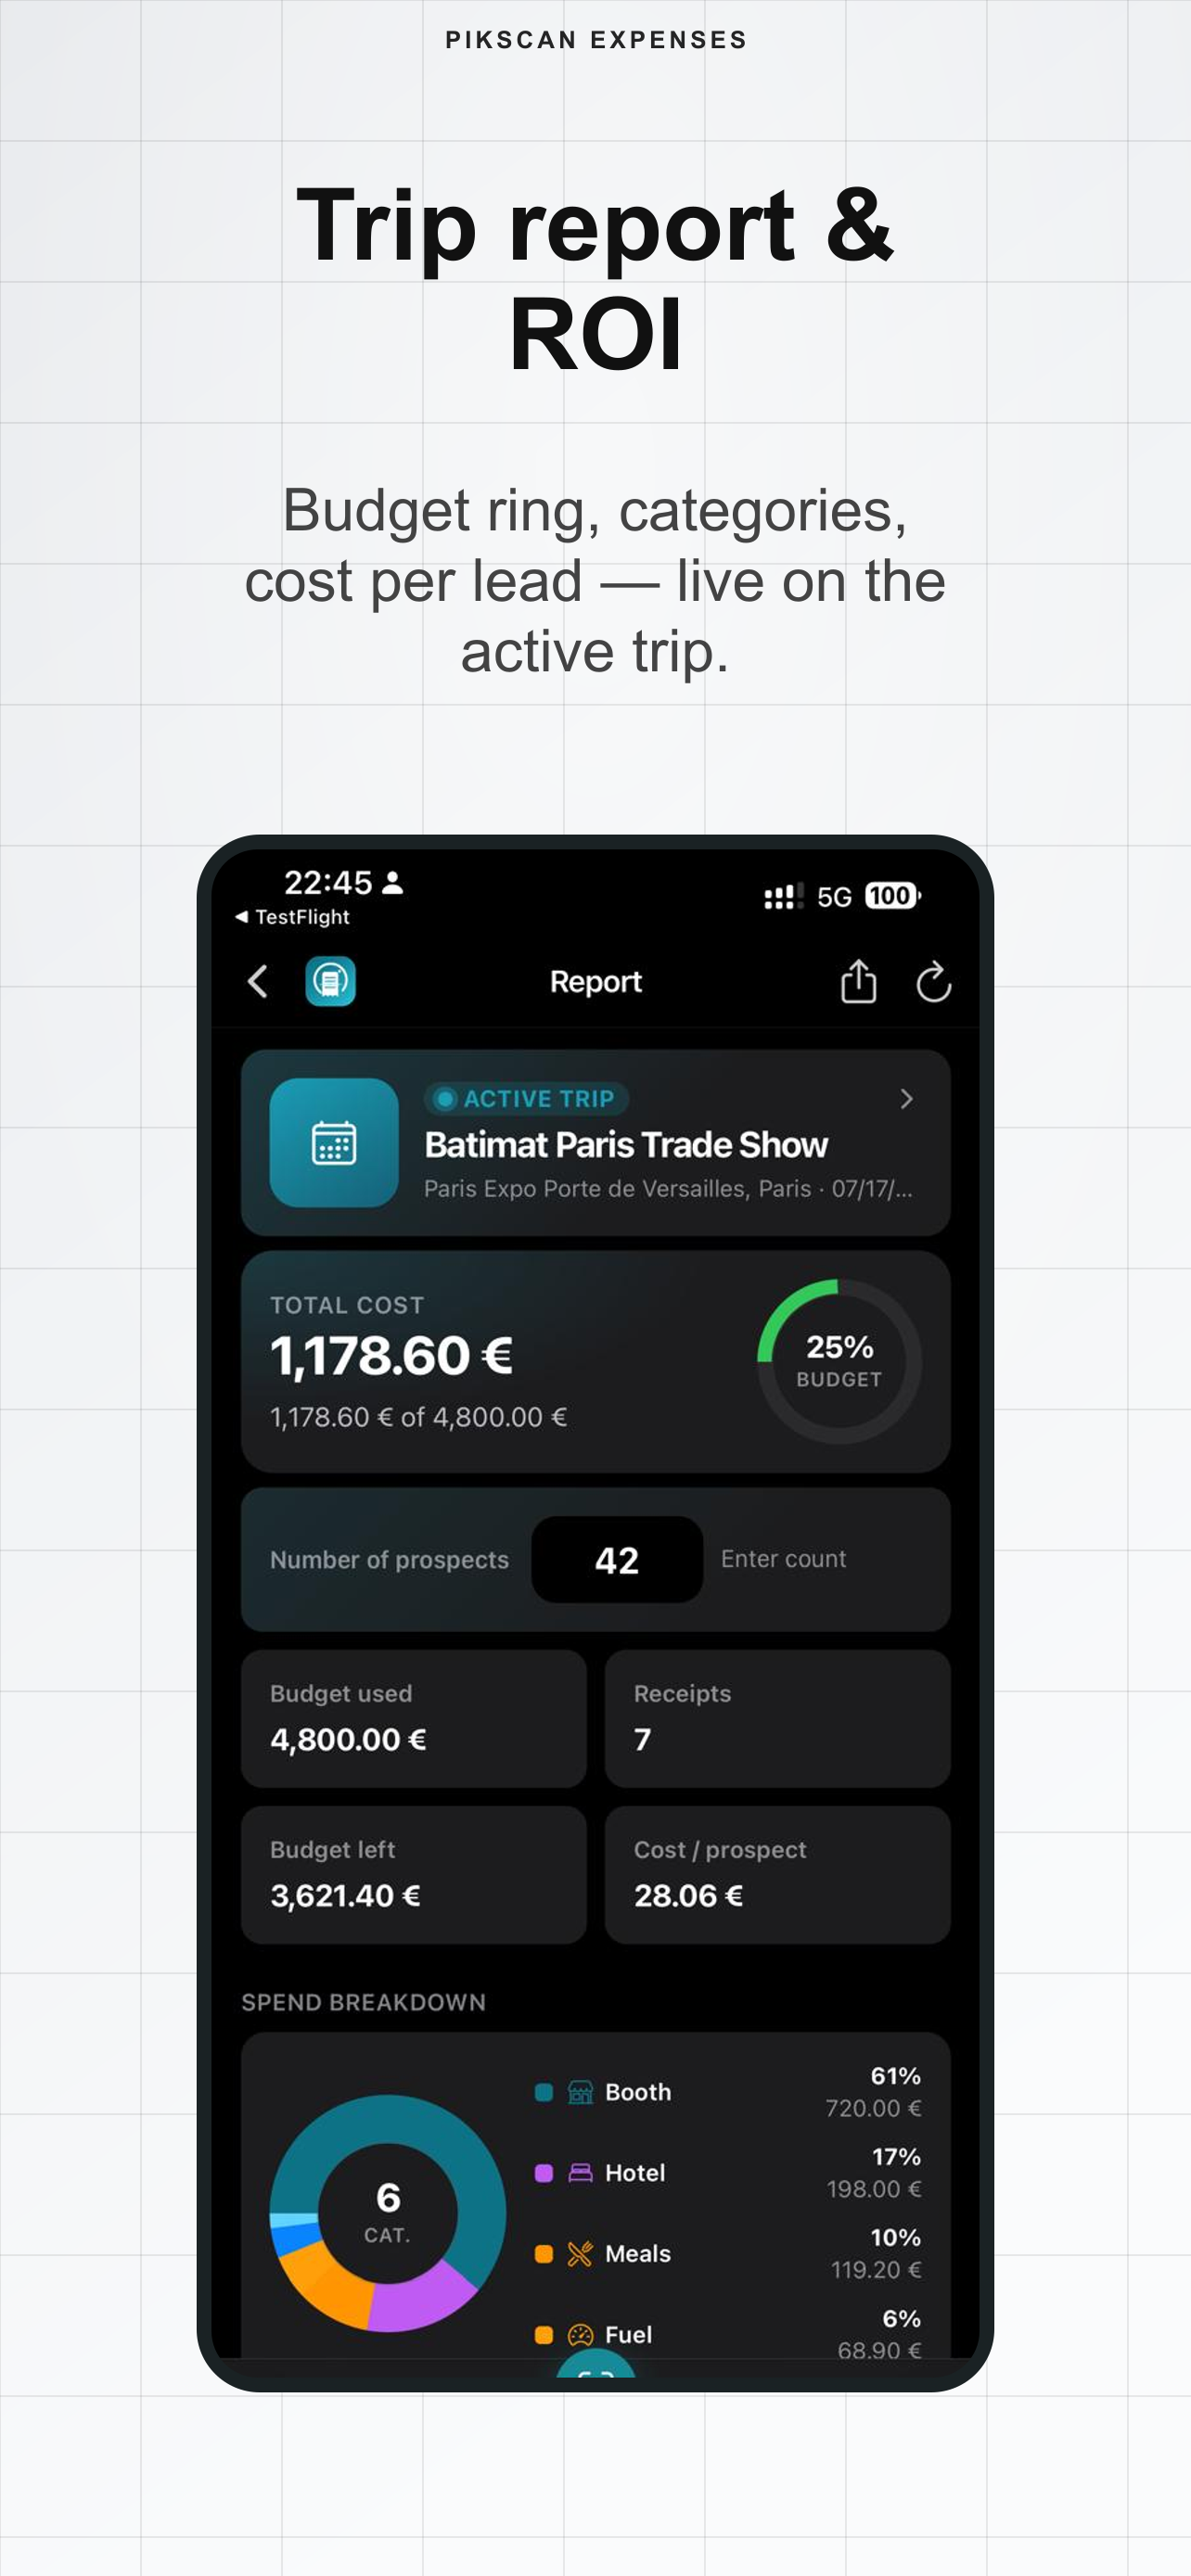
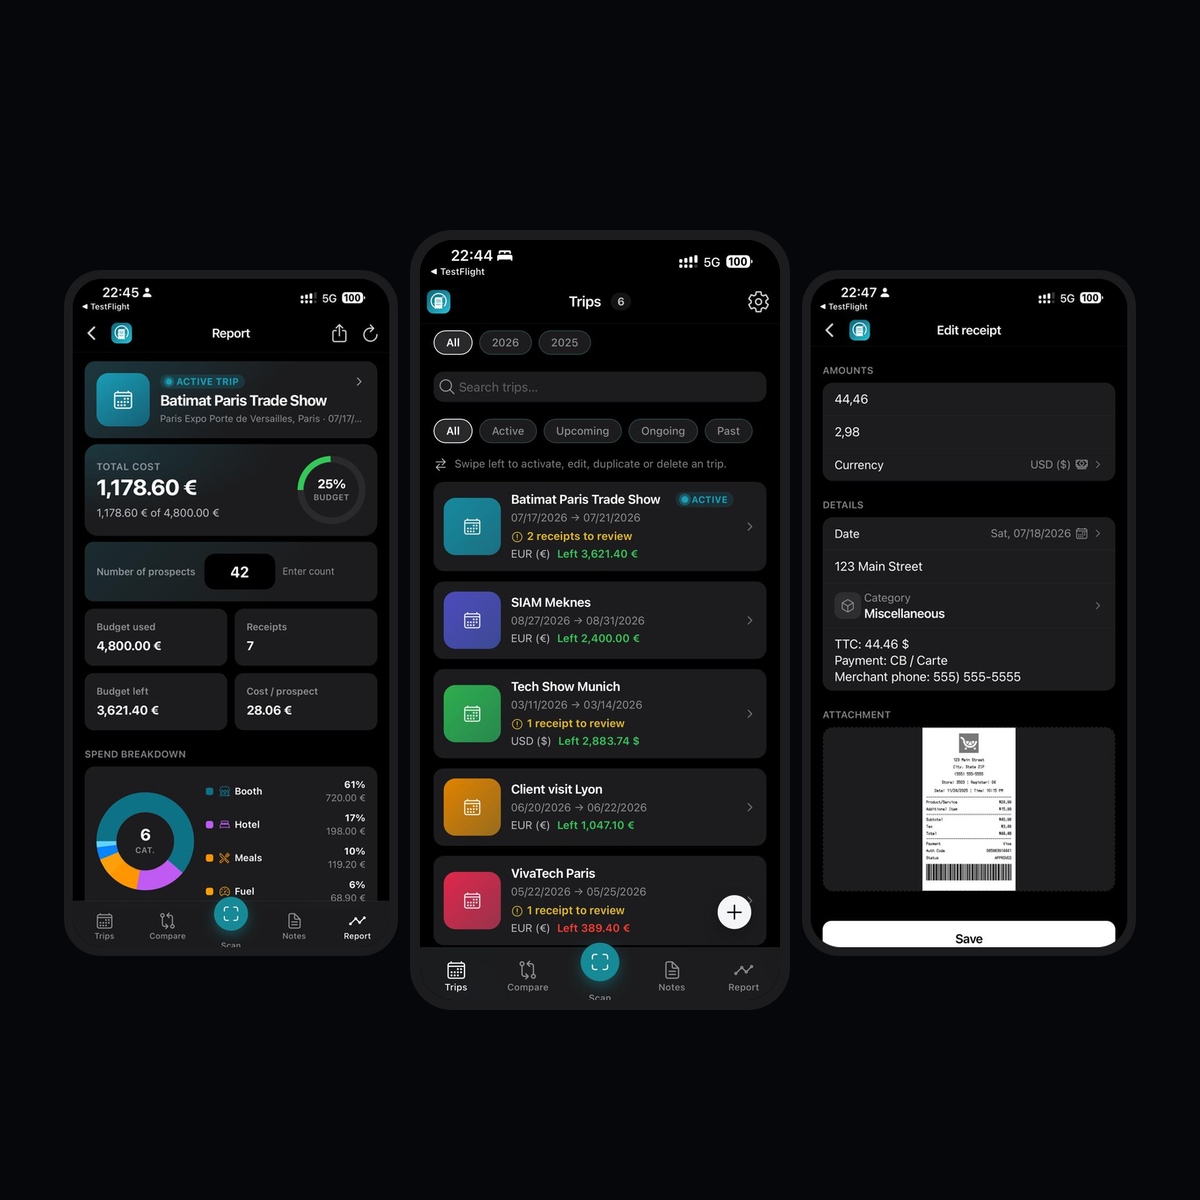
See total cost, budget ring, VAT, category breakdown and cost per prospect on the active trip.

  1. Open the Report tab (active trip by default).
  2. Check total spend vs planned budget and category donut.
  3. Enter number of prospects if you track cost per lead.
  4. Use the share / export icon to open the export sheet.
Trip report with budget and categories
Phase 3 · ROI 06

Compare two trips

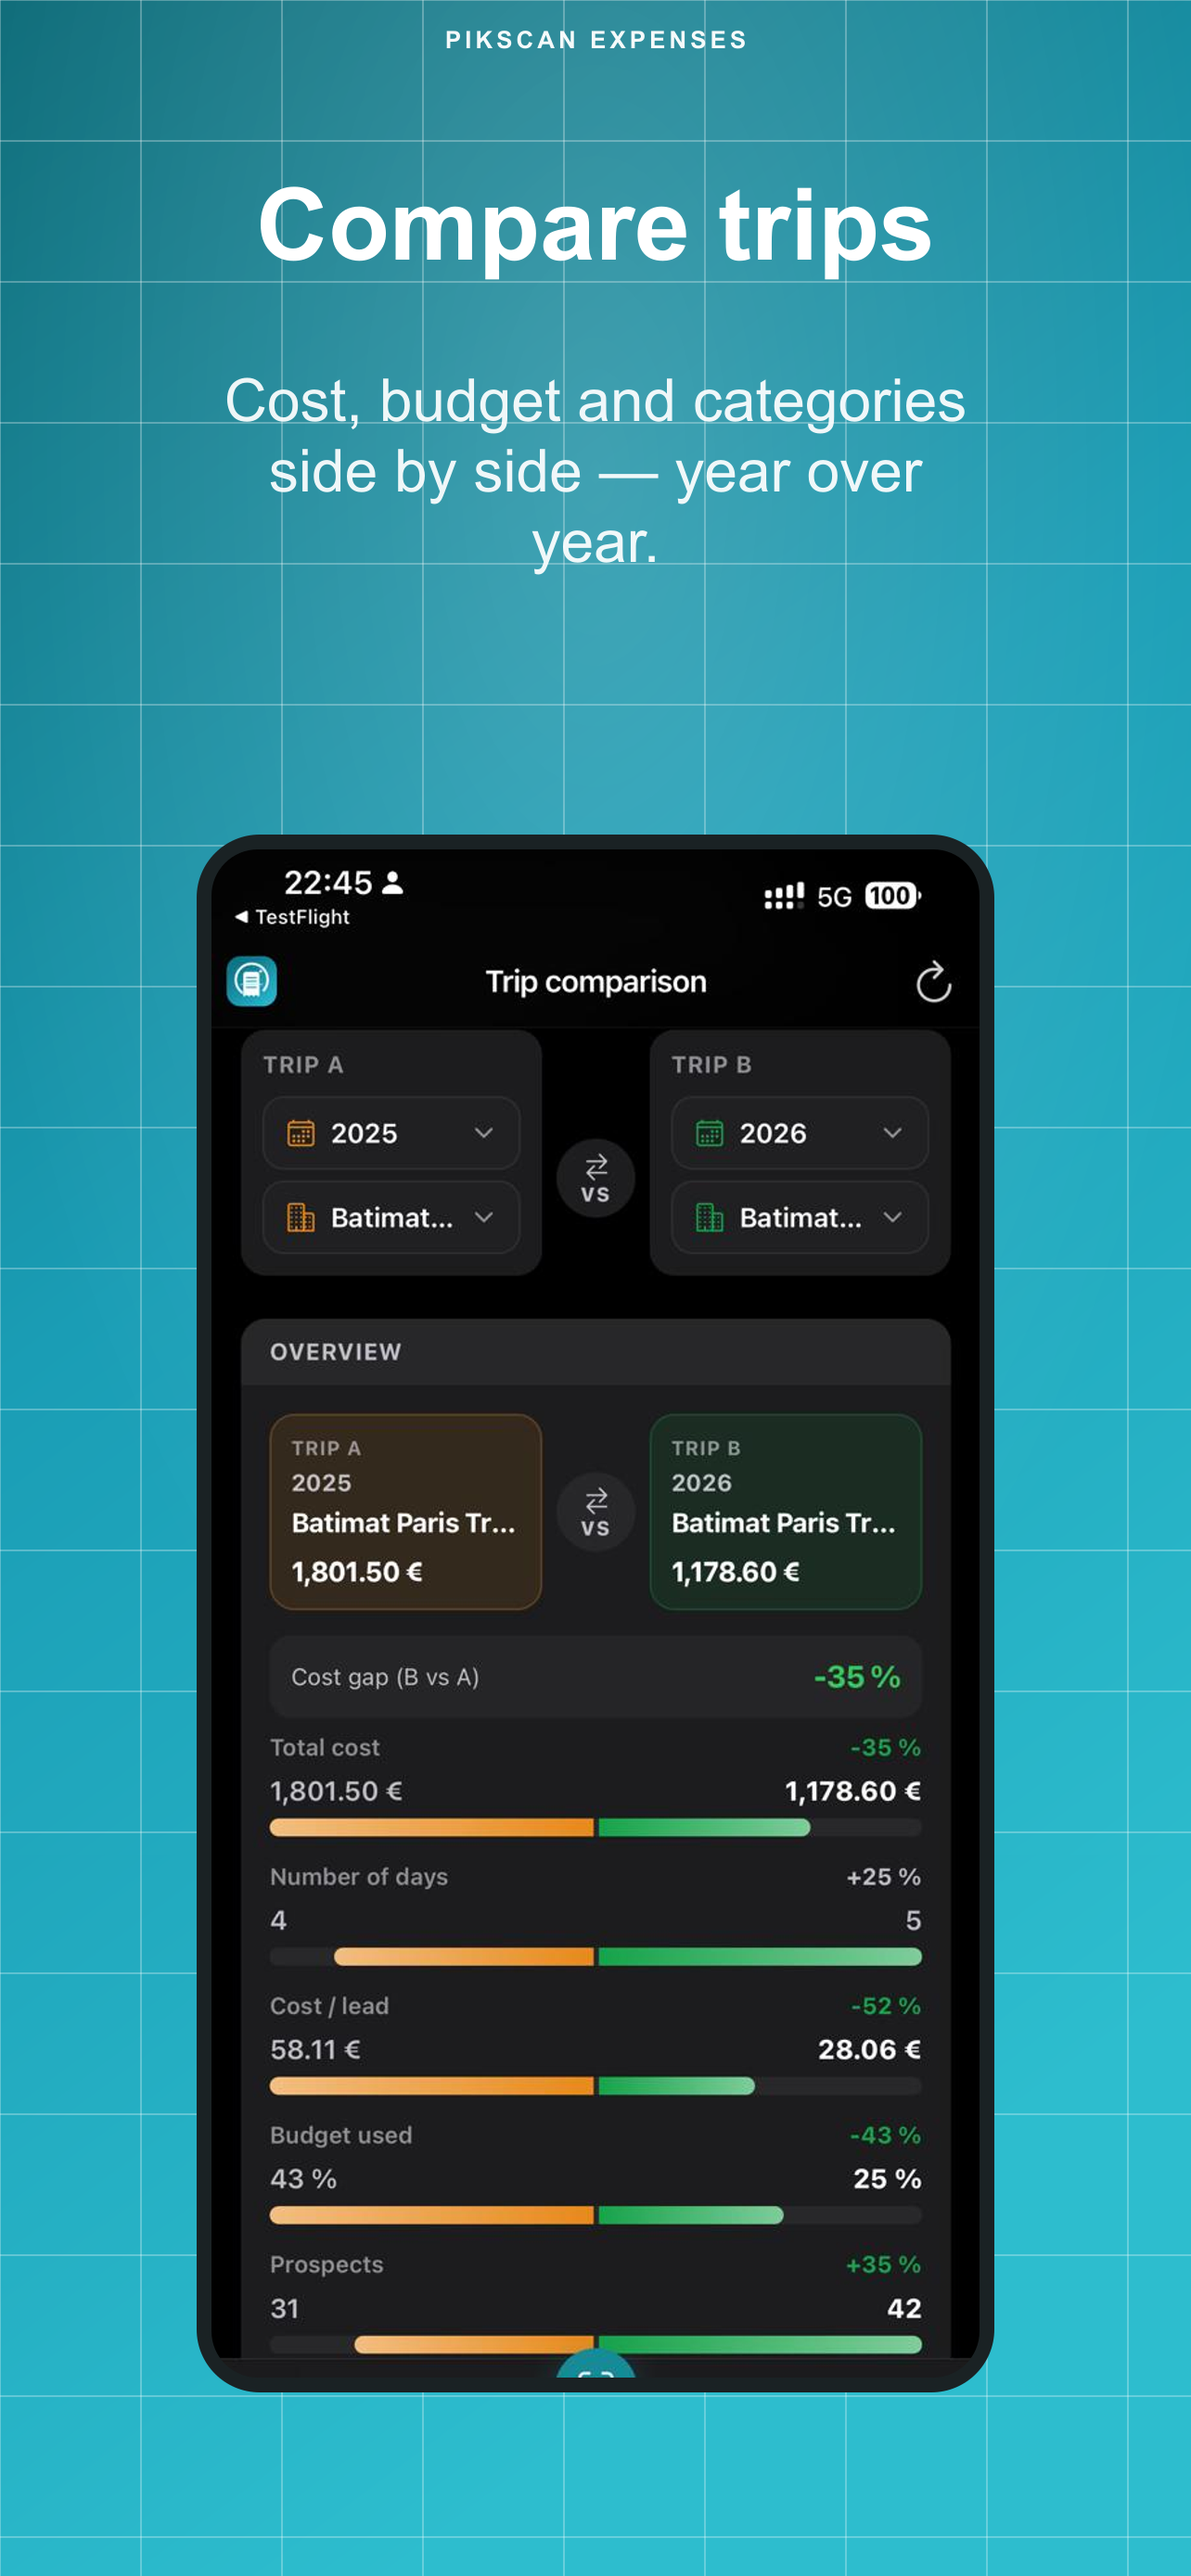
Put missions side by side: total cost, days, budget %, shared categories.

  1. Open the Compare tab.
  2. Pick year + trip A, then year + trip B (you need at least two trips with receipts).
  3. Read the delta headline and common categories. Swap A ↔ B anytime.
Trip comparison screen
Phase 4 · Export 07

Export to accounting

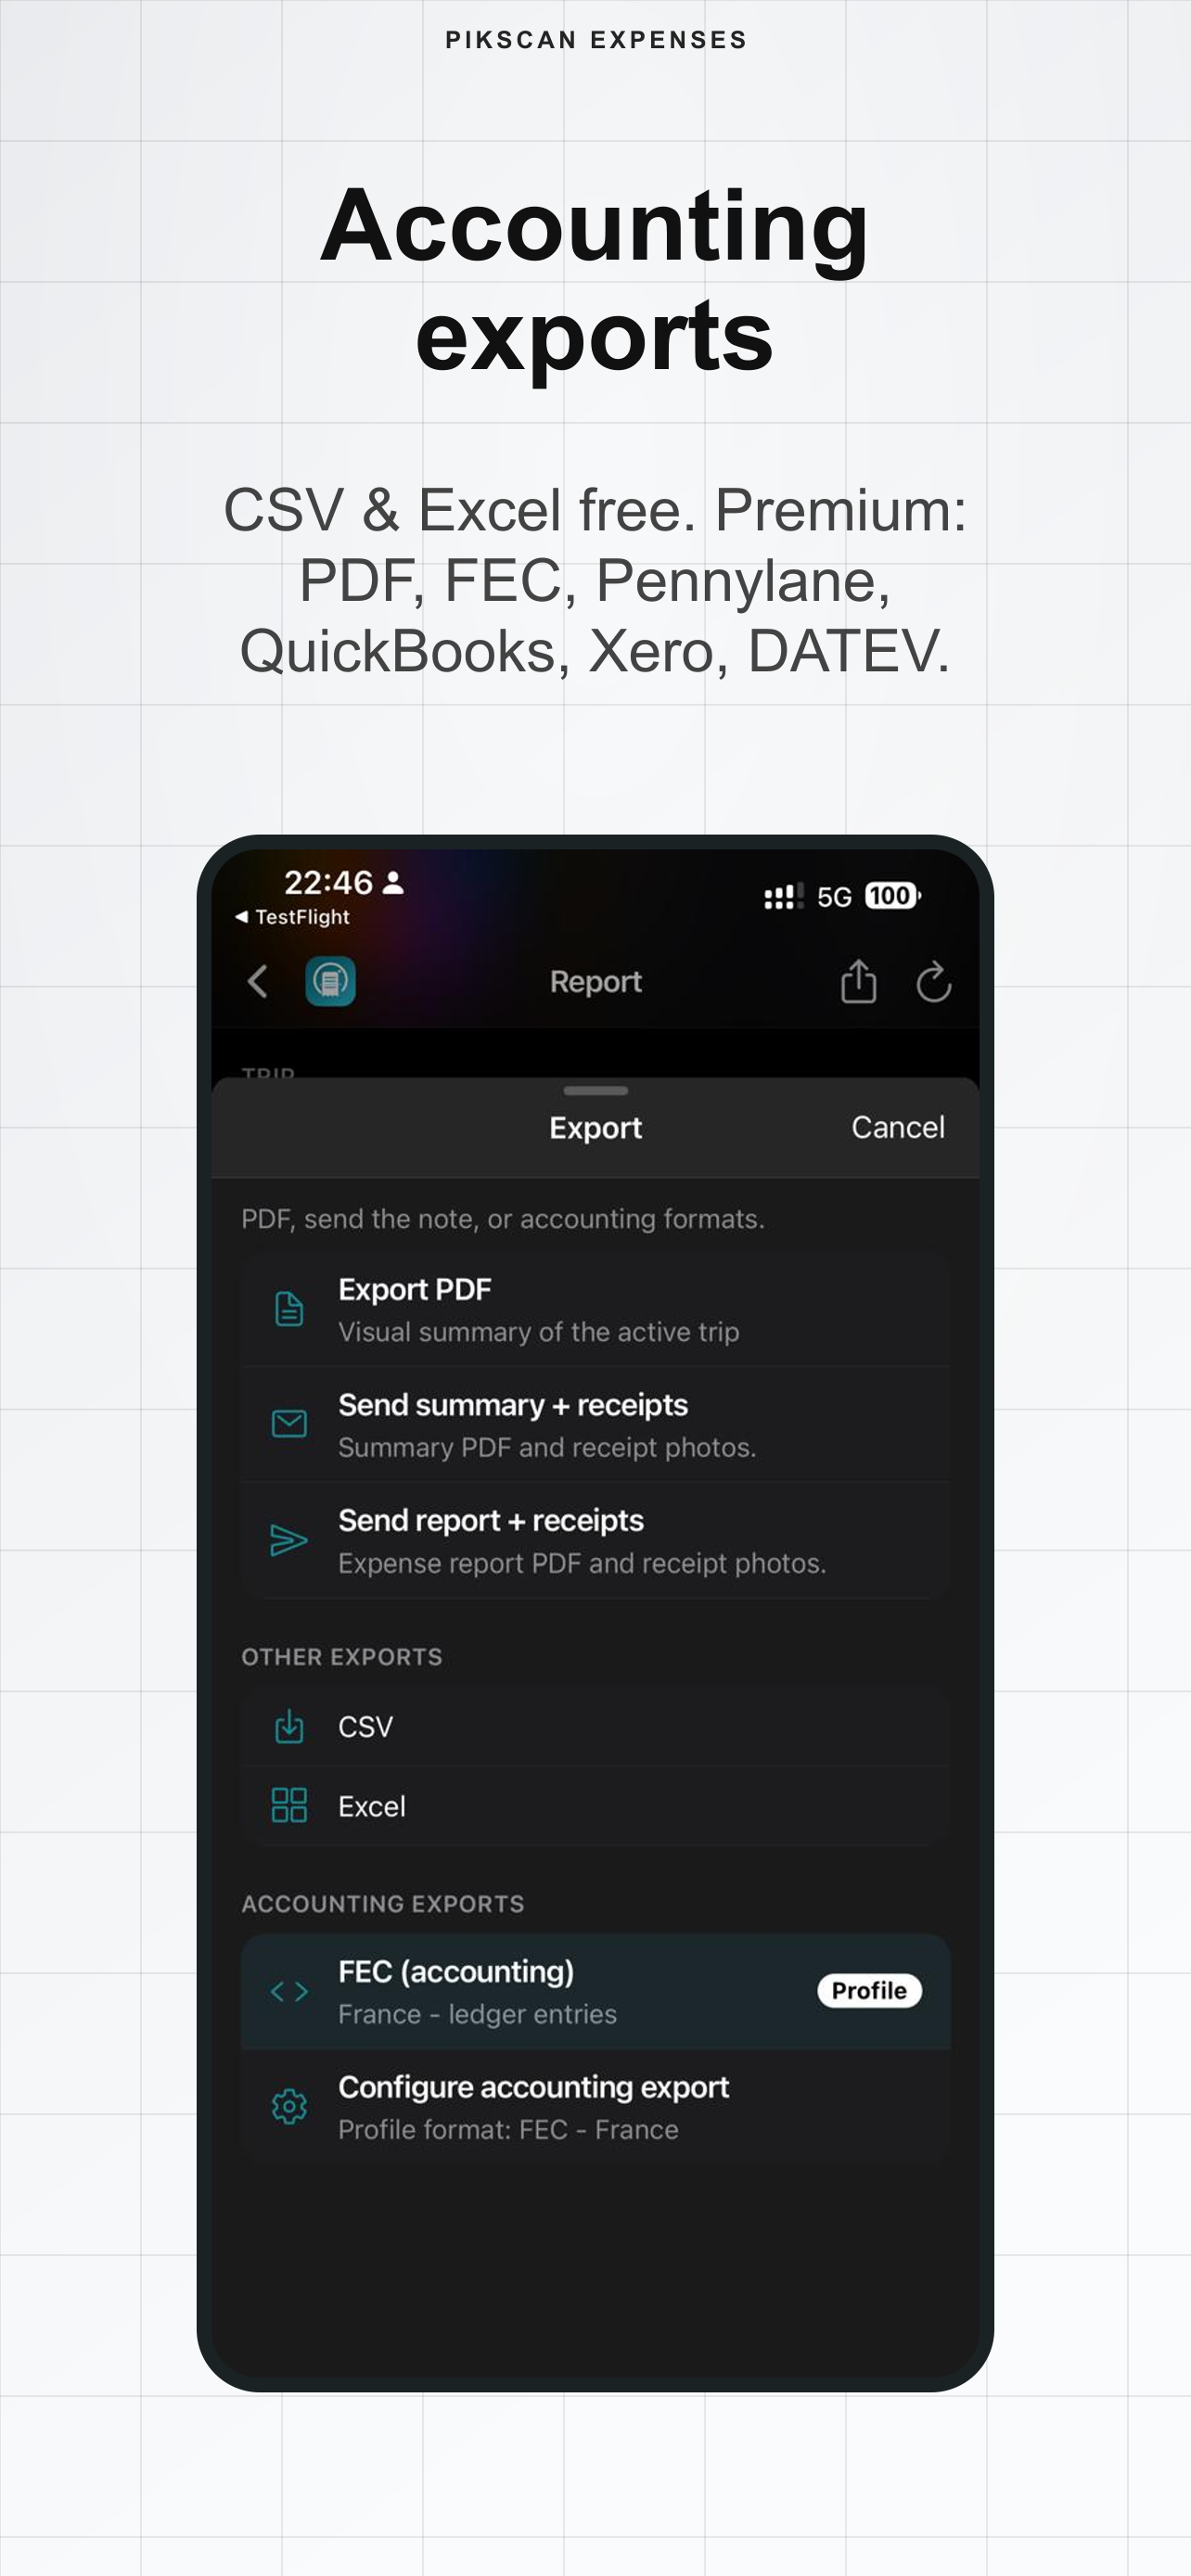
Share files yourself (AirDrop, Files, email). Nothing is uploaded to PikScan.

  1. From Report → Export (or the note menu).
  2. Free: CSV and Excel.
  3. Premium: PDF summary, send report + receipt photos, FEC, Pennylane, QuickBooks, Xero, DATEV, Sage, Wave, FreshBooks.
  4. Configure your preferred accounting format in Settings → profile.
Export sheet PDF CSV Excel FEC
Phase 4 · Settings 08

Settings, backup & Premium

Profile, languages, biometric lock, quota and full device backup.

  1. Open Settings from the gear on Trips (or Report).
  2. Fill employee profile (name, email, company, preferred currency, accounting format). Toggle Manager if you approve notes.
  3. Language: FR / EN / ES / DE. Optional Face ID / fingerprint lock.
  4. Backup: JSON free; full ZIP with receipt images on Premium. Restore by merge or replace.
  5. Premium: unlimited scans, PDF & accounting exports, full ZIP. Free: 30 scans + CSV/Excel.
PikScan Expenses app